Crocheted Chevron

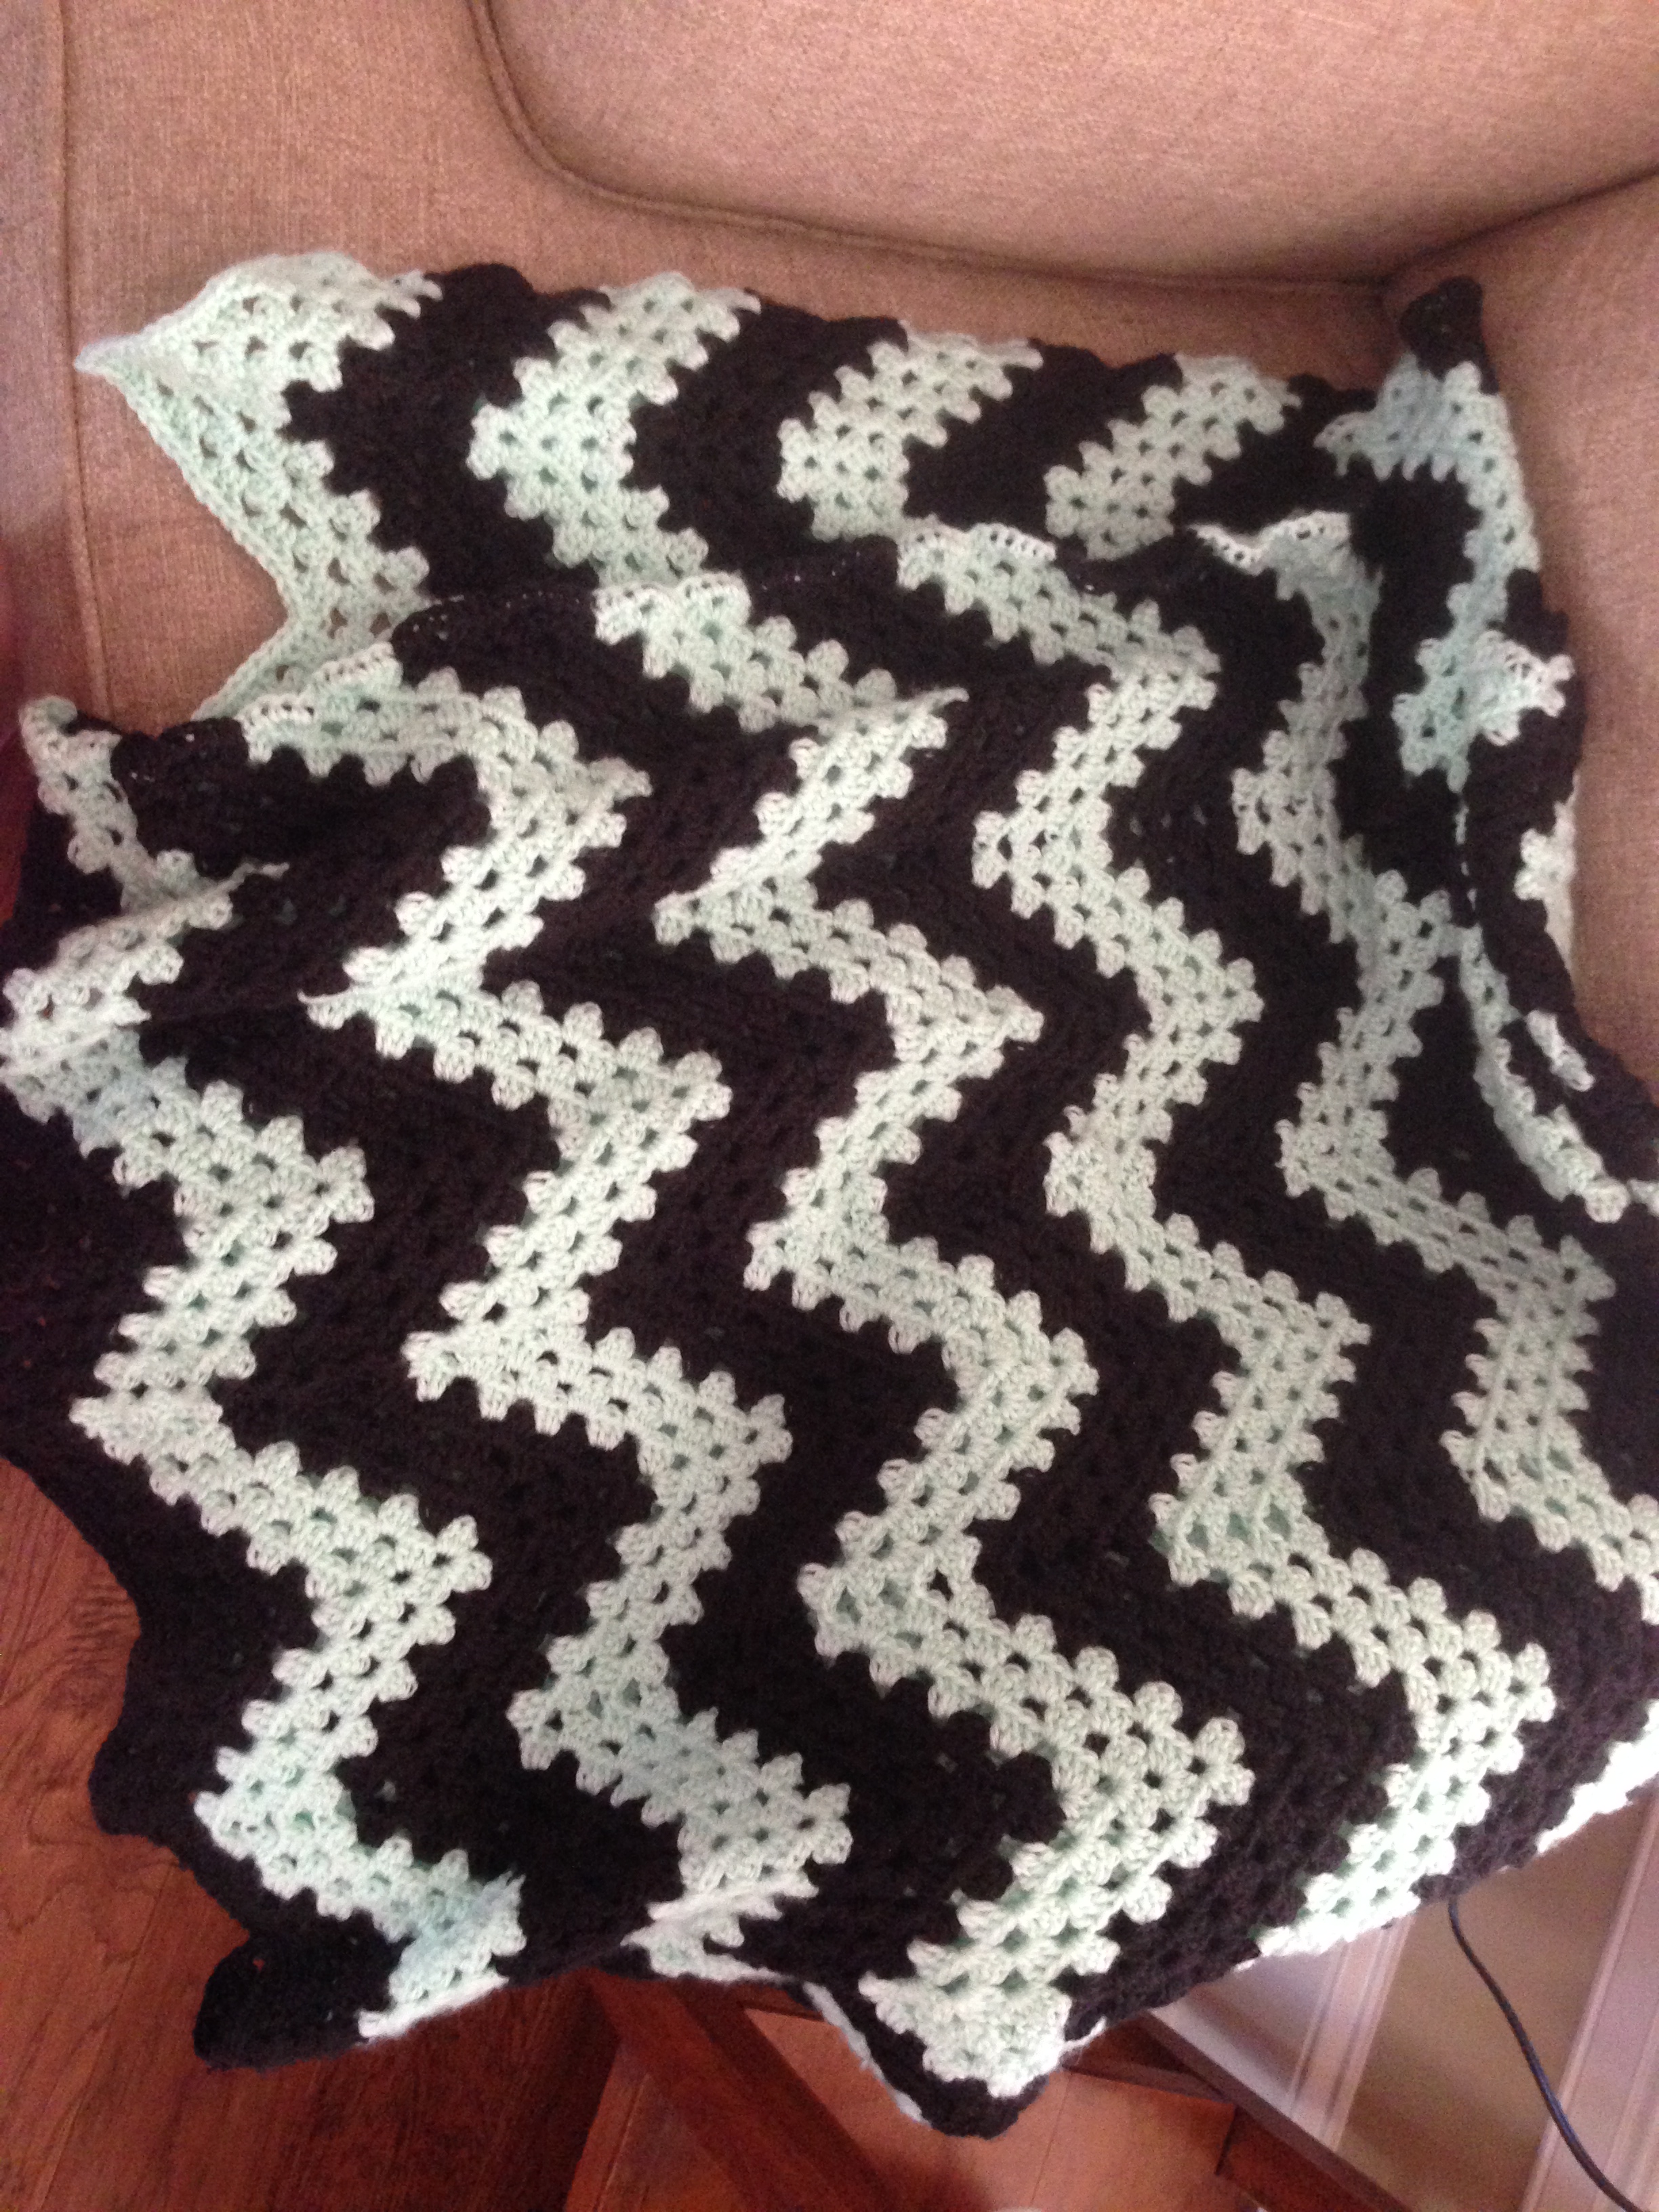
Sometimes out of boredom I start a craft project.  Often it is a project that requires more way more time than the few free hours I don’t know what to do with.  Such is the case with this chevron granny afghan I crocheted.  I just decided I wanted to crochet an afghan one day, and 6+ months later, I had a completed throw.  This project took extra time because I did not work on it consistently.  Had I devoted a regular amount of time to it each week, I probably could have finished it in a third of the time (about 2 months) as the rows did go fast.

This pattern was designed to use multiple colored stripes, but I went with a simple black and mint.  You make it in 4 panels, which is nice in the summer, because you don’t have to have the weight of a blanket on your lap to work on it.  Also, by working the afghan in panels, each row is fairly short.  This makes it easy to come to a good ending point if you don’t have a long chunk of time to work on it.

A friend of mine described this throw as a mix between modern and vintage.  It is cute, warm, and just reminds me of home.  So if you are looking for a cute and versatile throw look no further because the time commitment was totally worth it.

Image

Image

This is my favorite thing to wrap up in while watching tv.  In fact, I’m snuggled in it right now!

~ D


Sharpie Mugs Debunked

If you’ve been on Pinterest for any length of time you have surely come across the “sharpie mug” or “sharpie plate.”  Each post seems to have a slightly different set of directions, some of which work, most of which don’t.  So if you would like to see what finally did work for me (along with my first failed attempt), keep reading.

First of all if you use regular sharpies, you will be sorely disappointed.

Your project will look good at first

Image

First attempt: after baking

But I could tell they weren’t going to hold up to washing, even hand washing.  I read that you can spray them with craft sealant.  I tried that, but after one good scrub this is what they looked like:

Image

First attempt: after washing

So I did a lot of research before I found a way that worked, FOR REAL.

First you need to use an oil based sharpie paint pen.  You can still use cheap dollar store plates/ mugs, but definitely, definitely spring for this more expensive sharpie.  You can find them at craft stores in a bunch of colors and tip sizes.

Image

Draw you’re design on the mug.  Put items in a cool oven.  Turn oven on to 400.  Once oven reaches the temp, bake  for 30 minutes then turn off.  Leave items in oven until they cool.  And Voila!

Image

The high oven temp, does change the color of the paint slightly.  Those states were outlined in a light blue originally, and are now slightly green.  But I have no doubt they will last for a long time!  (If you want to avoid the color change, try black.  The pink seemed to hold up well for me too!)

Image

Now that you know the truth, get out there and make some fun cheap sharpie mugs and plates!

Have fun!

~D

Pampered Pups

So I have these two dogs.  They are small, and fluffy, and white.  And as is typical of small, fluffy, white dogs: they are SPOILED!

Especially by me (as they live with my mom 2 hours away).  So when I get to see them, I treat them like the King and Princess they are.

Image

I mean, seriously, who wouldn’t spoil them?!

Anyway, I decided to make them a(nother) dog bed after seeing this pin.

The directions are simple and easy to follow.  I’ll let you read them and just tell you what I did differently.

First I used two flannel baby blankets which were about 1 square yard each.

2013-08-17 13.17.01

Second I only cut the strips 2 in instead of 4, so there was more bed area.

Lastly, I wanted to stuff the bed with old t-shirts so make it more washable.  But, even between my mom and I, we didn’t have enough to fill it up, so I just used an old pillow instead.  It was the perfect size!

2013-08-19 11.25.03 2013-08-19 11.25.10

I think the pups liked it too!

2013-08-19 11.28.39

OK so Goober looks a little more confused here than happy, but the bed grows on him.  See.

2013-08-20 09.22.26

Gracie liked it too, especially when she could bully it away from her big brother!

2013-08-19 11.27.43

Love them!

~D

Girly Birthday Hat Headband

When I first saw this, I knew I had to make it for someone.  It was too perfect.  So when my friend Emily’s birthday was coming up I turned that dream into a reality.

First I cut the bottom of the hat off.  Then I covered it with card stock and decorated it.  Finally, I attached it to a thin silver headband I got inexpensively at Walmart with small strips of ribbon. And Voila! a birthday hat headband!

Image

I tried it on to make sure the it would stay and was in a good spot. 🙂

Image

The birthday girl!

Cheers!

~D

Super Fun Scarf (that anyone can make!)

This scarf is fun, and easy, and quick, and anyone with two arms can do it!

Yes, I’m talking about the ever pinterest popular Arm Knit Scarf.  It has been pinned from a variety of places but I used this tutorial to learn as I think she does the best job explaining what to do.

Image

The first scarf I made (took me about 45 minutes)

  Image

Finished Product

I have grown to love making these.  I have a bunch of colors and am actually selling them on Etsy!  I have a shop in which all the proceeds go for a good cause.  The arm-knit scarves are benefitting a friend of mine who is trying to adopt a special needs child from India.  Here are some of my scarves:

Image

Extra Long Scarf in Barley 

Image

These scarves now take me about 25 minutes to make!

Image

Here’s the link if you would like to check it out: etsy.com/shop/ForTheWorldChanger Check it out and help another child to find their forever home with these two cuties!

Image

Happy Pinning!

~D

Painted Wine Glasses

I fell in love with these glasses when I saw them on pinterest.  I went to the dollar store in search of tumblers and found stemless wine glasses instead.  I love them.  They are huge though, so I have to be careful when I fill them, because about an inch and a half is a full glass of wine.  I bought 4 glasses for a dollar each and and a pack of glass paint from Michaels for less than 5 dollars so I got a whole set of wine glasses for less than $10.  I was stoked.  All I had to do was paint the glasses, wait a day for the paint to dry completely, then sit them in the oven at 150 deg for an hour or so (the directions to cure them in the oven are on the package of paint, so follow those instructions not mine).

Here they are in their pretty glory!

Image

Image

Bottoms up!

~D

Crochet Slippers

Happy New Year!

I love to crochet.  Especially easy quick things.  I get too distracted and want to move on if the project is going to take more than a few days.

These slippers were the perfect thing to make at a craft party that some of my friends and I had at the end of the semester.
Each slipper takes about an hour to make if you sit and do it all at once.
Image
I was also making size 9 slippers but I made some small changes to the original instructions:
  • I used a size H hook, because I didn’t have a G at home.  
  • I did a total of 10 rounds instead of 13 for the toe.
  • For Rows 11-15 (The first group of straight rows) I made 20 double crochet.
  • For Rows 16-19 I increased by one dc at the beginning of each row. (Row 19 has 24 stitches.)
  • Row 20 (This is important to make the heel round): I did 8 double crochet, then yarned over, put the hook under the next two stitches and finished the double crochet (this pulls two stitches together into one stitch).  I repeated this 3 more times, then did 8 regular double crochet.

Image

For the bows: I chained 40 with the biggest hook I had.  Then tied it in a bow and stitched it on the slipper.
I love these slippers.  They are snug when you first make them, but stretch out nicely.  They are light and warm and oh so easy!
Happy Pinning!
~ D

DIY: The Best Hair Ties

The first time I saw those knotted hair ties I thought, “Why are these so expensive? Its just colored elastic tied in a knot.  I can do that.”

But, I couldn’t find the right elastic at the craft store, and got busy with life and forgot all about my mission to make cheap hair bands.

Then I stumbled upon this pin.  The blogger said she found the elastic at Michaels.  I tried again to find it but had no luck.

Though I returned empty handed, I also returned with a mission.  I searched for the material online and came across this post which had a link to this website.  I was in heaven.  Image

I ordered my elastic (the plain colors were $ 0.50, the neon colors were $ 0.60, and the glitter was ($1.20)  I got 15 yards of various colors, each yard making 4 hair ties.  So for about 10 bucks I got 60 bands.  Not too shabby.

Image

They were so easy to do.

Image

All the pretty colors

Image

Lots of Christmas gifts

Happy Tying!

~D